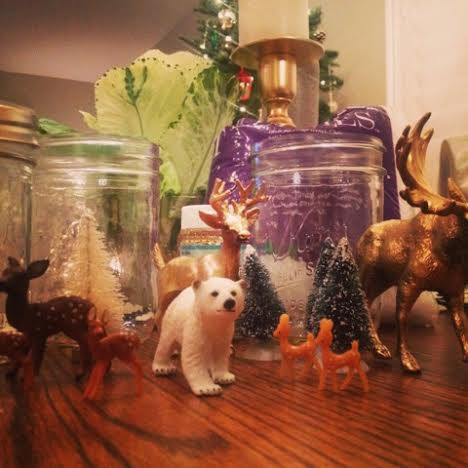
Snow Globes are a great easy craft project for any age or the DIY beginner. We made them for christmas stocking stuffers and little scenes around the house. Here's a step-by-step process to make it easier!
Step One: Gather all supplies
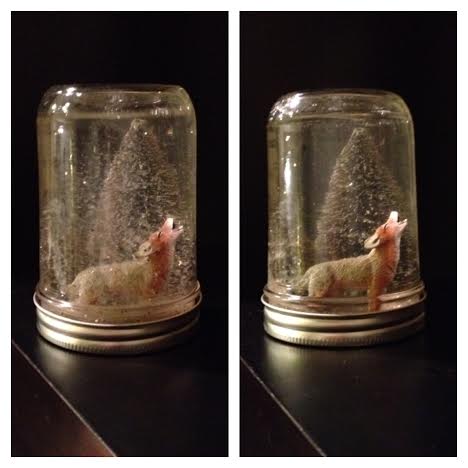
Step Two: Assembly
Sandpaper the inside of the lid before starting the glueing process so your creatures don't float in the arctic. We may or may not have found this out the hard way. Assemble your scenery and make sure the jar fits over your vignette before glueing trees/creatures to the lid. Wait for them to dry completely and add sparkles/snow to jar. Add water almost to the top. Add one to two drops of glycerin. This slows down the sparkles and snow so they flutter and flurry rather than fall. If you add too much it will clump. We may have also learned this the hard way. Screw lid on tightly and shake! TADA!!!!!
-s&e
Step One: Gather all supplies
- Jars with lids
- Glycerin (found in the beauty isle)
- Glitter
- Synthetic Snow
- Mini trees, animals, characters, lions, tigers, and bears oh my!!!!
- Sandpaper
- Hot glue
- Spray Paint (optional for lids)
Step Two: Assembly
Sandpaper the inside of the lid before starting the glueing process so your creatures don't float in the arctic. We may or may not have found this out the hard way. Assemble your scenery and make sure the jar fits over your vignette before glueing trees/creatures to the lid. Wait for them to dry completely and add sparkles/snow to jar. Add water almost to the top. Add one to two drops of glycerin. This slows down the sparkles and snow so they flutter and flurry rather than fall. If you add too much it will clump. We may have also learned this the hard way. Screw lid on tightly and shake! TADA!!!!!
-s&e

 RSS Feed